a new way to live
Below are a few very short videos (without any sound) to help you understand how simple the production Console* is, to Operate @ Freeway.
* The ATEM Mini Pro console is manufactured by Blackmagic Design.
Production Screen Layout (45 Seconds)
Recap:
For a diagram of all the buttons please refer to detail at the bottom of this page.
Basic production Console Buttons (40 Seconds)
Recap: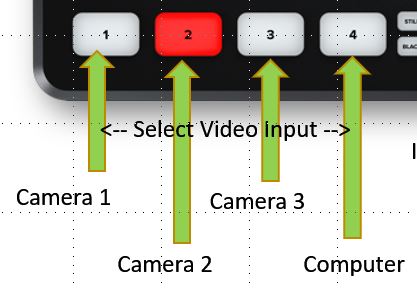
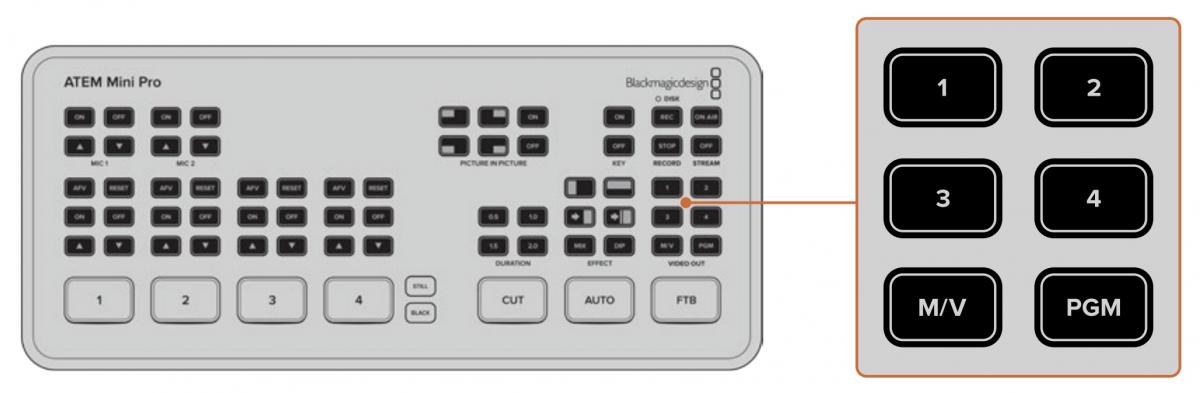
4 VIDEO INPUTS
- 3 Cameras
- Plus Multimedia Computer
- Simple Push Button Swap
For a
- diagram of a pictorial/written overview, please refer to this FAQ on overview-of-console
- diagram of all the buttons please refer to detail at the bottom of this page.
- For a diagram of all the connections, please refer to detail at the bottom of this page.
Recording and Streaming (1:18 seconds)
We should always aim to record.
There may however be times when we don't stream, or interrupt the stream temporarily during a service.
Be times when
Recap: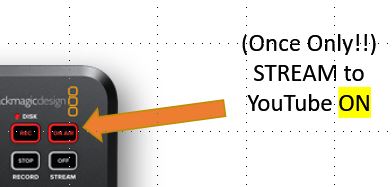
To Start recording and Streaming:
-
Press the STREAM button on the top right hand corner of the production console.
To Start Recording:
- Press the RECORD button to ensure that a copy of the service is recorded to the USB drive in case the internet drops out or there are issues with YouTube.

For written instructions, refer to:
For a diagram of all the buttons please refer to detail at the bottom of this page.
Volume Control (1:13 seconds)
Recap:
For a diagram of all the buttons please refer to the bottom of this page.
Overlaying Lyrics (1:10 seconds)
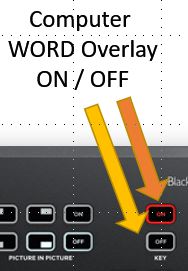
Song,lyrics are set up to be displayed in-house, directly from the Faithlife Proclaim program on the connected PC.
To show the, on the recording and Live Stream, you need to use, what we call, the "Words" button, which uses a green screen technique to overlay them on one of the Camara video feeds.
Recap:
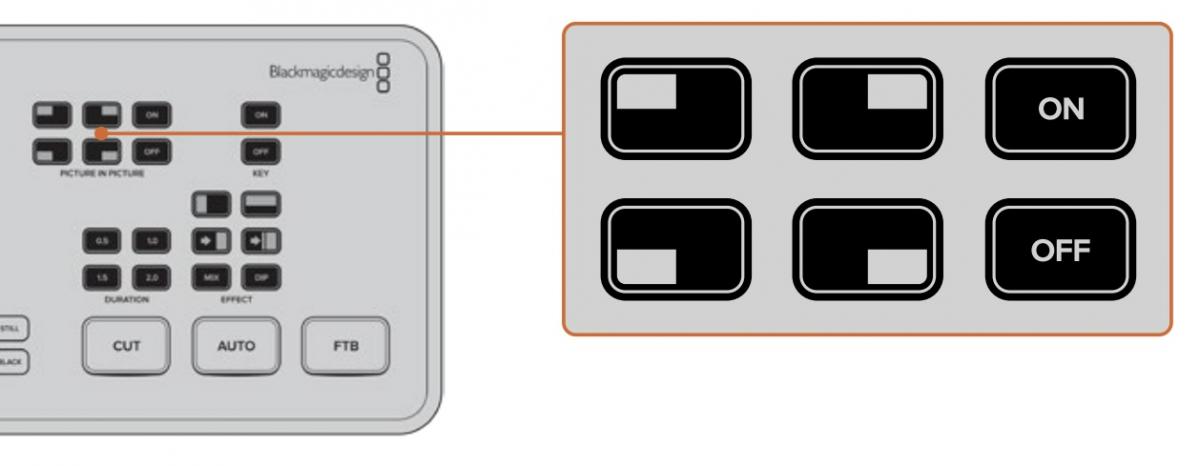
Picture in Picture (1:03 seconds)
Slides or images from the computer will usually only be displayed for a short while via the Camera "4" Pc button.
For times when you may also with to show the speaker as well as the PC's Image, you an optionally use the Picture-in-Piicture (PIP) option.
Recap:
Full Screen Preview - optional (42 seconds)
Recap:
Full List of Buttons on Console
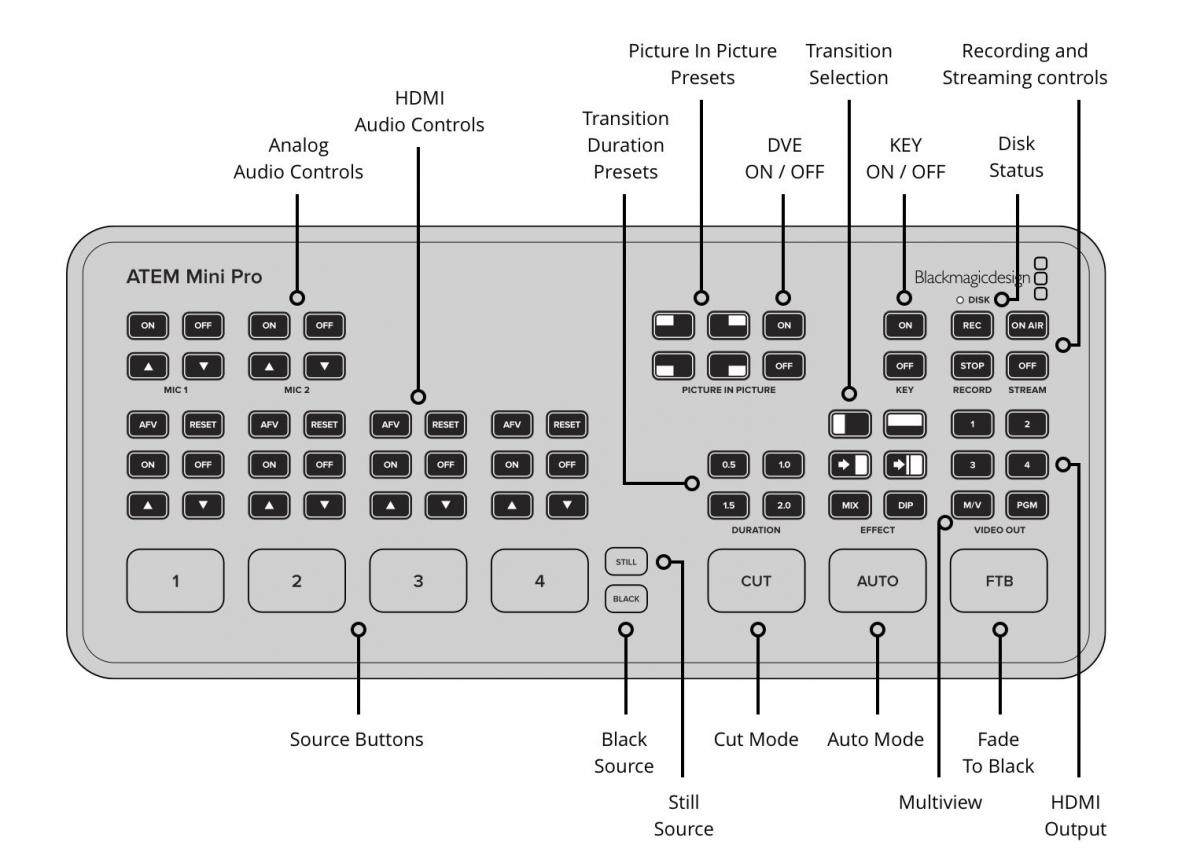
Here's a brief description of each button on the ATEM Mini Pro console:
- **HDMI Input Buttons (1-4)**: Switch between the four HDMI sources (1 to 4)
- **Cut Button**: Perform a hard cut to switch to the selected source.
- **Auto Button**: Apply an automatic transition to the selected source.
- **Transition Buttons**: Select and apply different transitions (e.g., Mix, Dip, Wipe).
- **Upstream Key Button**: Activate chroma keying for picture-in-picture effects.
- **Downstream Key Button**: Add overlays like logos and graphics.
- **Media Player Control**: Manage media files and add them to your production.
- **Record Button**: Start or stop recording to a connected USB drive.
- **Stream Button**: Start or stop live streaming.
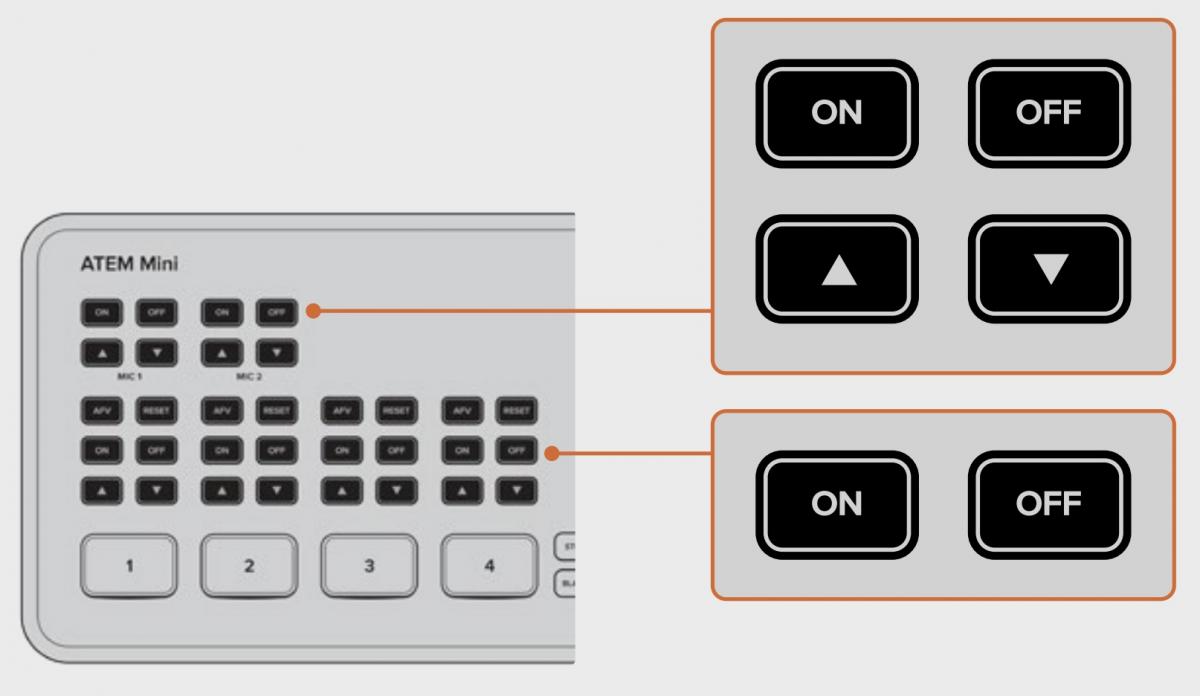
- **Mic and Audio Controls**: Adjust audio inputs and levels.
- **Mix Button**: Selects a mix transition, allowing you to smoothly transition from one source to another. You can set the duration of the mix transition.
- **Dip Button**: Applies a dip to color transition, which fades the outgoing video source to a specified color before switching to the new source.
- **APV Button**: Activates the Advanced Picture-in-Picture (APV) feature, overlaying a smaller video feed on top of the main video feed.
- **Rest Button**: Resets the console to its default settings or clears the startup state.
- View Overview of this box on the BlackMagicDesign website.
The Console, as used @Freeway Baptist Church.

/p>
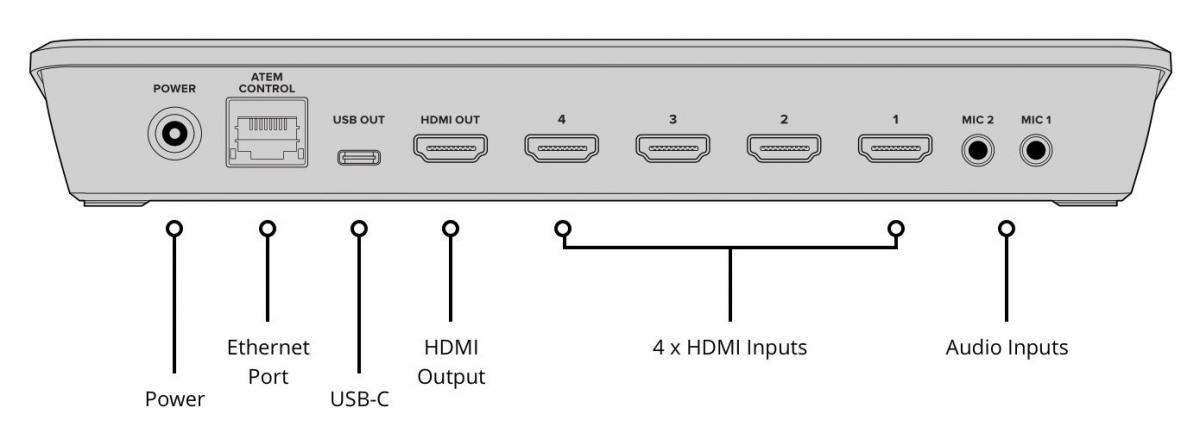
Connections (back panel)
Random FAQs
- Can we play recorded Christian music before or after services?
- Can I show event attendees or absentees filtered in People screen? (Admin Use Only)
- How can I practice songs in the Key that Freeway usually uses?
- How do I turn off ChurchTrac Tips? (Admin use only)
- How to print off, or extract a church directory for Freeway leaders. (Admin use only)
- How do I link to OneDrive folders or files?